You Can Now Jailbreak A PS4 With An LG TV

You might think that jailbreaking a PS4 to run unsigned code is a complicated process that takes fancy tools and lots of work. While developing said jailbreaks was naturally no mean feat, thankfully they’re far easier for the end user to perform. These days, all you need is an LG TV.

Of course, you can’t just use any LG TV. You’ll need a modern LG webOS smart TV, and you’ll need to jailbreak it before it can in turn be used to modify your PS4. Once that’s done, though, you can install the PPLGPwn tool for jailbreaking PS4s. It’s based on the PPPwn exploit released by [TheFlow], which was then optimized by [xfangxfang] and implemented for LG Smart TVs by [zauceee]. Once installed, you just need to hook up your PS4 to the TV via the Ethernet port. Then, with the exploit running on the TV, telling the PS4 to set up the LAN via PPPoE will be enough to complete the jailbreak.

There are other ways to jailbreak a PS4 that don’t involve the use of a specific television. Nonetheless, it’s neat to see the hack done in such an amusing way.

Continue reading “You Can Now Jailbreak A PS4 With An LG TV”

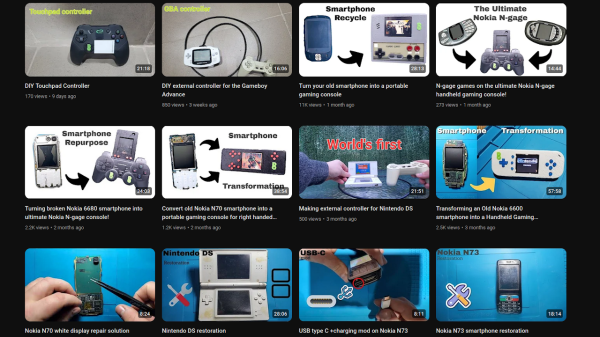
Screenshot of the YouTube channel videos list, showing a number of videos like the ones described in this article.

[DiyOtaku] Gives Old Devices A New Life

Sometimes we get sent a tip that isn’t just a single article or video, but an entire blog or YouTube channel. Today’s channel, [Diy Otaku], is absolutely worth a watch if you want someone see giving a second life to legendary handheld devices, and our creator has been going at it for a while. A common theme in most of the videos so far – taking an old phone or a weathered gaming console, and improving upon them in a meaningful way, whether it’s lovingly restoring them, turning them into a gaming console for your off days, upgrading the battery, or repairing a common fault.

The hacks here are as detailed as they are respectful to the technology they work on. The recent video about putting a laptop touchpad into a game controller, for instance, has the creator caringly replace the controller’s epoxy blob heart with a Pro Micro while preserving the original board for all its graphite-covered pads. The touchpad is the same used in an earlier video to restore a GPD Micro PC with a broken touchpad, a device that you can see our hacker use in a later video running FreeCAD, helping them design a 18650 battery shell for a PSP about to receive a 6000 mAh battery upgrade.

Continue reading “[DiyOtaku] Gives Old Devices A New Life”

How Additional Aerodynamic Drag Helped Make GTA III Work On PS2

The PlayStation 2 was a revelation when it hit the market in 2000, and yet by modern standards, it’s almost hopelessly weak. In fact, it’s so under-powered, Rockstar developers had to pull every trick in the book to make Grand Theft Auto IIIĀ even work on the platform.

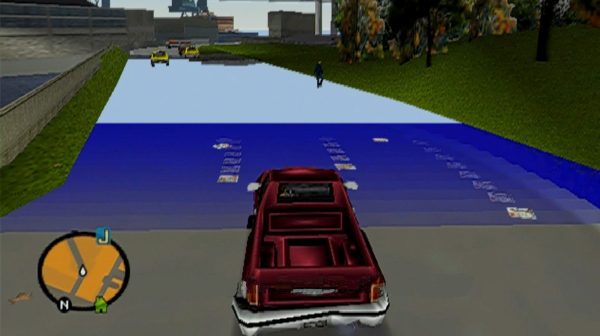
The story comes to us from developer [Obbe Vermeij]. He explains that the PlayStation 2 couldn’t keep the entire open-world game map in its tiny 32 MB of RAM. Instead, models had to be streamed from the DVD drive as the player moved around the world. However, even the DVD drive wasn’t fast enough. If the player moved too quickly, they would outpace the system’s ability to load new assets, and the world would fall apart. Roads would vanish, buildings simply wouldn’t appear before the player passed by them.

According to [Obbe], getting around this challenge was the job of one [Adam Fowler]. He notes that even optimizing the layout of data on the DVD wasn’t enough to help. Nifty hacks had to be employed to slow the player down. Road networks were changed to stop the player speeding towards areas that needed lots of new models. In other areas, vehicles in the game would experience a nearly-imperceptible 5% increase in air drag to dull their speed. This was chosen as a more invisible solution; cutting engine power directly was audible to players as the audio changed.

It shows you just how hard developers had to work back when resources were far more constrained than they are today!

Make Your Own Play Station (The Space Is Important)

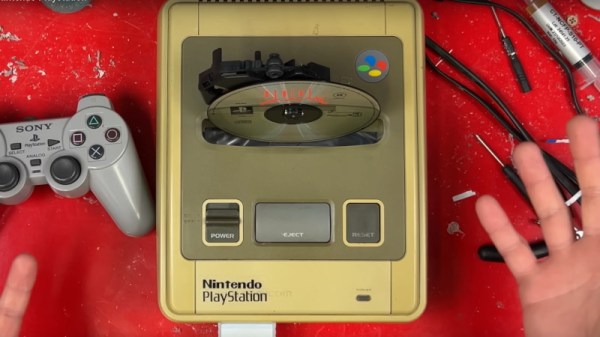
The early history of the Sony Playstation lies in a stillborn collaboration between Nintendo and Sony to produce an SNES with a CD-ROM drive. So the story goes, Nintendo’s Philips deal angered Sony, who decided to make their own console line, and the rest is history. A very small number of prototypes were made, badged as “Play Station,” and should you find one that escaped today, you’re sitting on a fortune. [James] doesn’t have one, but he did have half a Playstation and an SNES shell, so he could make an ungodly child of the two consoles that you can see in the video below the break.

Those Playstation CD-ROM drives were notorious for melting back in the day, so it’s no surprise they’re still for sale today. Thus, he was able to bring the Sony back to life. What follows is an episode of console cutting worthy of a slasher horror movie, as instead of a bit of fine Dremmeling, he brings out an angle grinder and slices away with abandon. We don’t like the Nintendo switch carrying mains voltage, but we’re fine with the PlayStation expansion connector going away. The Nintendo eject button needs a hack to operate the Playstation door open button when pressed. It’s cool to see the board has a mod chip. We used to fit those as a sideline in a previous life. Continue reading “Make Your Own Play Station (The Space Is Important)”

Drop-In Upgrade PCB Brings USB-C To DualShock 4

Despite a somewhat shaky start, it seems like everyone is finally embracing USB-C. Most gadgets have made the switch these days, and even Apple has (with some external persuasion) gotten on board. That’s great for new hardware, but it can lead to a frustrating experience when you reach for an older device and find a infuriatingly non-oval connector on the bottom.

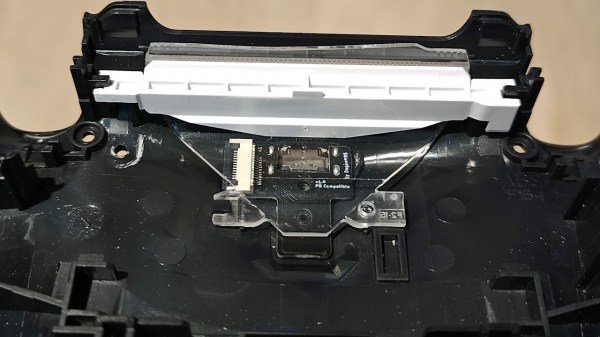
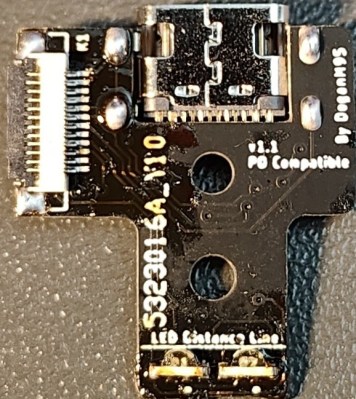
If one of those devices happens to be Sony’s DualShock 4 controller, [DoganM95] has the fix for you. Sony wisely put the controller’s original micro USB connector on a separate PCB so it could be cheaply replaced without having to toss the main PCB — that same modularity also means it was relatively easy to develop a USB-C upgrade board.

That said, there was a bit of a catch. The USB board on the DualShock 4 also carries a LED module that illuminates the “Light Bar” on the rear of the controller. In this design, [DoganM95] has replaced the original component with a pair of side-firing LEDs. Combined with the extra pins in the flexible printed circuit (FPC) connector necessary to control them, and the pair of 0603 resistors required for USB-C to actually provide power, putting this board together might take a bit more fine-pitch soldering than you’d expect.

Over the last couple of years, we’ve seen a wide array of devices receive DIY USB-C upgrades. In fact, this isn’t even the first time we’ve seen it done on the DualShock 4. But there’s something about hacking a modern port onto a legacy piece of hardware that we just can’t seem to get enough of.

Pi Pico Breathes New Life Into Original PlayStation

Those gamers who were playing in the mid 1990s may retain a soft spot for Sony’s first PlayStation. The grey console was the thing to have a quarter century ago, but we’re guessing few who had one will have a soft spot for their CD mechanisms. These were seemingly manufactured from Sony’s finest chocolate, and would stop working at the slightest hint of getting warm.

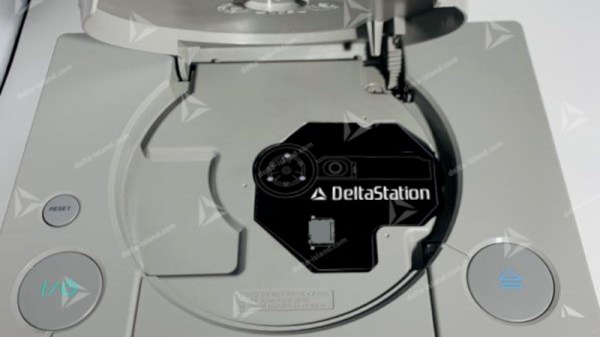
With the hardware now long in the tooth, what is to be done with a dead CD drive? Perhaps [Xrider] has the answer, with a CD Drive emulator board which fits in the space left by the original (French language, translation link).

Doing the hard work is a Raspberry Pi Pico, building on the Picostation project. To that it brings a drive-shaped board, as well as a series of daughterboards for the various different revisions of the Sony motherboard. The games meanwhile are loaded from a micro-SD card.

As single board computers have become ever faster, it’s no surprise that one would be able to emulate a ’90s CD mechanism with ease. What this does raise though is the interesting prospect that the Picostation might be adapted for other less-popular CD-based platforms. For those of us for whom games consoles in the CD era were both work and play, we hope that other consoles will receive this benefit.

Exploring The Hall Effect For Haptic Feedback PS4 Joysticks

Modern gaming console controllers aren’t without their annoyances — Joy-Con drift, anyone? The problems might stem from design deficiencies, but we suspect that user enthusiasm and the mechanical stress it can introduce might play a significant role as well. Either way, [Marius Heier] decided to take a look at what would be required to build a better joystick and came up with some interesting results.

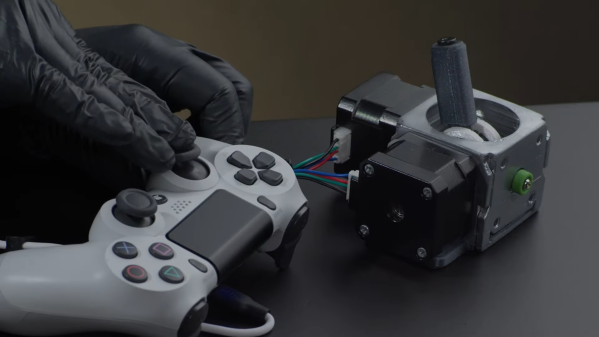
The first video below lays the basic groundwork, with a bunch of experiments with 3-axis Hall effect sensors, specifically the Texas Instruments TMAG5273 and TMAG5170. They’re essentially the same sensor with different interfaces — SPI for the 5170 and I2C for the 5273. Using just one of these sensors, he was able to build a joystick with the usual X- and Y- axis control, but also with a rotary axis. What’s more, he built a motorized version using two NEMA 17 steppers to mechanically drive the stick back to center.

The joystick is bulky, but it looks like he’s got plans for a much smaller one with [Carl Bugeja]-style PCB motors that should fit into a PS4 controller. That’s the subject of the second video below, which uses a different Hall sensor — an Allegro A1304 — and is mainly concerned with getting the output of a non-motorized but considerably miniaturized joystick stick talking the language that the controller expects. It’s not a simple process, but it seems to be coming along nicely, and we’ll be watching progress closely.

Continue reading “Exploring The Hall Effect For Haptic Feedback PS4 Joysticks”