Put More Korry In Your Flight Sim Switches

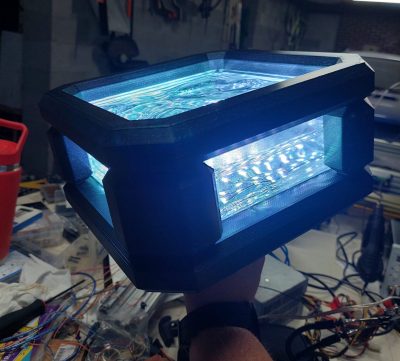
Never underestimate how far some flight simulator aficionados will go with their builds. No detail is too small, and every aspect of the look and feel has to accurately reflect the real cockpit. As a case in point, check out these very realistic Korry buttons that [Santi Luib III] built for an Airbus A320 simulator.

Now, you might never have heard of a “Korry button” before, but chances are you’ve seen them, at least in photos of commercial or military aircraft cockpits. Korry is a manufacturer of switches and annunciators for the avionics industry, and the name has become shorthand for similar switches. They’ve got a very particular look and feel and are built to extremely high standards, as one hopes that anything going into a plane would be. That makes the real switches very expensive, far more so than even the most dedicated homebrew sim builder would be comfortable with.
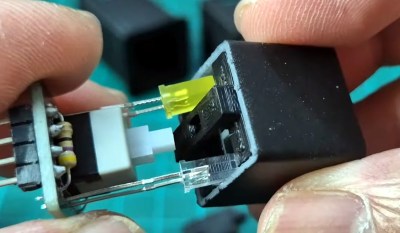
That’s where [Santi] comes in. His replica Korry buttons are built from off-the-shelf parts like LEDs and switches mounted to custom PCBs. The PCB was designed for either momentary or latching switches, and can support multiple LEDs in different colors. The assembled PCBs snap into 3D printed enclosures with dividers to keep light from bleeding through from one legend to the other.

The lenses are laser-cut translucent acrylic painted with urethane paint before the legends are engraved with a laser. The attention to detail on the labels is impressive. [Santi]’s process, which includes multiple coats of sealers, gets them looking just right. Even the LEDs are carefully selected: blue LEDs are too bright and aren’t quite the proper shade, so [Santi] uses white LEDs that are dimmed down with a bigger resistor and a light blue photographic gel to get the tint just right.

These buttons are just beautiful, and seeing a panel full of them with the proper back-lighting must be pretty thrilling. If civil aviation isn’t your thing, check out this A-10 “Warthog” cockpit sim, and the cool switches needed to make it just right.

Continue reading “Put More Korry In Your Flight Sim Switches”

Boneblocker Is A Big LED Wall That Rocks

[Nick Lombardy] took on a job almost every maker imagines themselves doing at some point. He built a giant LED wall and he did a damn fine job of it, too. Introducing BoneBlocker.

BoneBlocker is an 8 x 14 wall of glass blocks that lives at a bar called The Boneyard. Each block was given a length of WS2812B LED strip. 30 LED/meter strips were chosen, as initial maths on the 60 LED/meter strips indicated the whole wall would end up drawing 1.5 kW. Discretion, and all that.

The glowing game controller.

The whole display is run from a WT32-ETH01 board, which is a fast ESP32-based module that has onboard Ethernet to boot. [Nick] used the WLED library as he’d seen others doing great things with it, performance-wise. He ended up using one board per column to keep things fast, but he reckons this was also probably a little bit of overkill.

His article steps through the construction of the wall, the electronics, and the software required to get some games working on the display. The final result is quite something. Perhaps the best bit is his explanation of the custom controller he built for the game. Dig into it, you won’t be disappointed.

In particular, we love how the glass blocks elevate this display to a higher aesthetic level. We’ve seen other great projects tread this same route, too. Video after the break.

Continue reading “Boneblocker Is A Big LED Wall That Rocks”

DIY DNA Lamp

DIY Electronics Plus Woodworking Equal Custom Lamp

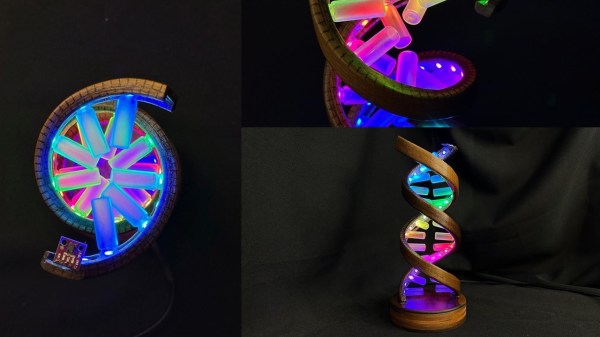
There is something about wooden crafts that when combined with electronics, have a mesmerizing effect on the visual senses. The Gesture Controlled DNA Wooden Desk Lamp by [Timber Rough] is a bit of both with a nice desk piece that’s well documented for anyone who wants to build their own.

Construction starts with a laser cutter being employed to add kerfs, such that the final strips can be bent along a frame tube to form the outer backbone of the DNA helix structure. Add to the mix some tung oil, carnauba wax, and some glue — along with skill and patience — and you get the distinct shape of sugar-phosphate backbone.

The electronics include an ESP8266 with the PAJ7620 gesture sensor that controls two WS2812B RGB LED Strips. The sensor in question is very capable, and comes with the ability to recognize nine human hand gestures along with proximity which makes it apt for this application. The sensor is mounted atop the structure with the LEDs twisting down the frame to the base where the ESP8266 is tucked away. Tiny glass bottles are painted with acrylic spray varnish and then glued to the LEDs to form the base pairs of the double helix. We thought that the varnish spray was a clever idea to make light diffusers that are quick and cheap for most DIYers.

We previously covered how this particular gesture sensor can be used to control much more than a lamp if you seek more ideas in that realm.

Continue reading “DIY Electronics Plus Woodworking Equal Custom Lamp”

Build Your Own RGB Fill Light For Photography

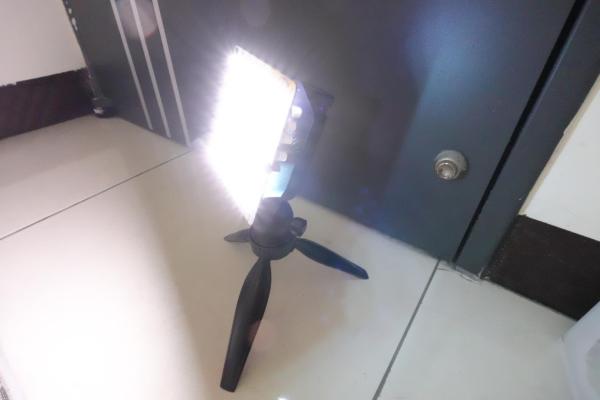
Photography is all about light, and capturing it for posterity. As any experienced photographer will tell you, getting the right lighting is key to getting a good shot. To help in that regard, you might like to have a fill light. If you follow [tobychui]’s example, you can build your own!

Colors!

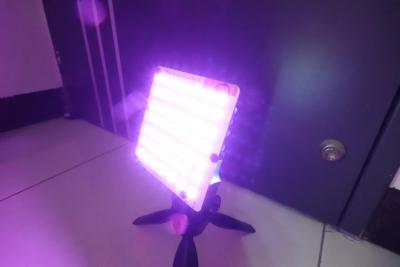
The build relies on addressable WS2812B LEDs as the core of the design. While they’re not necessarily the fanciest LEDs for balanced light output, they are RGB LEDs, so they can put out a ton of different colors for different stylistic effects. The LEDs are under the command of a Wemos D1, which provides a WiFI connection for wireless control of the light.

[tobychui] did a nice job of building a PCB for the project, including heatsinking to keep the array of 49 LEDs nice and cool. The whole assembly is all put together inside a 3D printed housing to keep it neat and tidy. Control is either via onboard buttons or over the WiFi connection.

Files are on GitHub if you’re seeking inspiration or want to duplicate the build for yourself. We’ve seen some other similar builds before, too. Meanwhile, if you’re cooking up your own rad photography hacks, don’t hesitate to let us know!

Trick Your (1970) Pickup Truck

[Dave] wanted an old pickup, and he found a GMC Sierra Grande truck vintage 1970. While it had an unusual amount of options, there weren’t that many high-tech options over 50 years ago. The five-year-long restoration work was impressive, as you can see in the video below, but we were really interested in the electronics part. As [Dave] mentions, the truck was made when the Saturn V was taking people to the moon, but after his modifications, the truck has a lot more computing power than the famous rocket.

He was concerned that the taillights were not up to modern standards and that it would be too easy for someone using their cell phone to plow into the rear of the truck. So he broke out an ESP32 and some LEDs and made an attractive brake light that would have been a high-tech marvel in 1970.

Continue reading “Trick Your (1970) Pickup Truck”

Celebrating Pi Day With A Ghostly Calculator

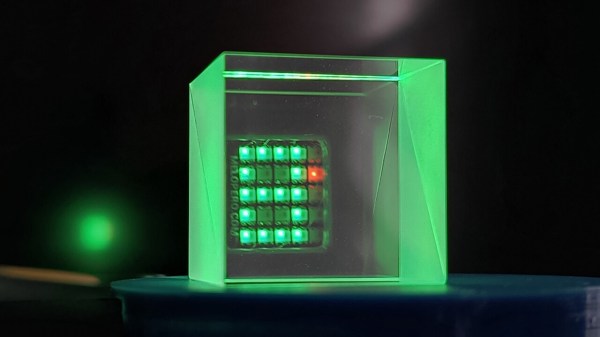
For the last few years, [Cristiano Monteiro] has marked March 14th by building a device to calculate Pi. This year, he’s combined an RP2040 development board and a beam-splitting prism to create an otherworldly numerical display inspired by the classic Pepper’s Ghost illusion.

The build is straightforward thanks to the Cookie board from Melopero Electronics, which pairs the RP2040 with a 5×5 matrix of addressable RGB LEDs. Since [Cristiano] only needed 4×5 LED “pixels” to display the digits 0 through 9, this left him with an unused vertical column on the right side of the array. Looking to add a visually interesting progress indicator for when the RP2040 is really wracking its silicon brain for the next digit of Pi, he used it to show a red Larson scanner in honor of Battlestar Galactica.

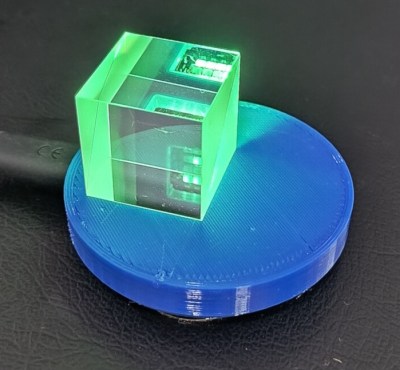
With the MicroPython code written to calculate Pi and display each digit on the array, all it took to complete the illusion was the addition of a glass prism, held directly over the LED array thanks to a 3D-printed mounting plate. When the observer looks through the prism, they’ll see the reflection of the display seemingly floating in mid-air, superimposed over whatever’s behind the glass. It’s a bit like how the Heads Up Display (HUD) works on a fighter jet (or sufficiently fancy car).

Compared to his 2023 entry, which used common seven-segment LED displays to show off its fresh-baked digits of Pi, we think this new build definitely pulls ahead in terms of visual flair. However, if we had to pick just one of [Cristiano]’s devices to grace our desk, it would still have to be his portable GPS time server.

Continue reading “Celebrating Pi Day With A Ghostly Calculator”

LED Choker Is A Diamond In The Junk Pile

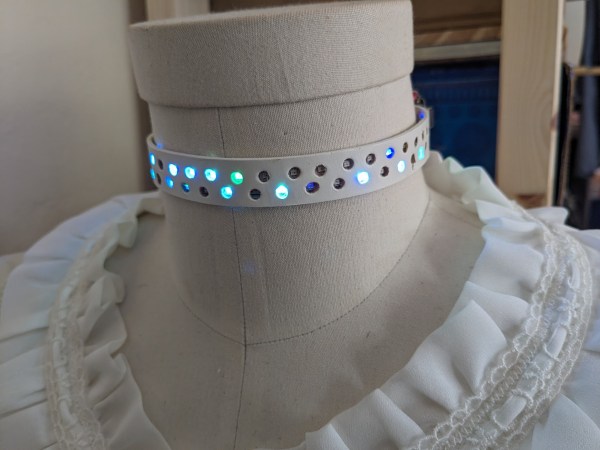
Isn’t it great when you find a use for something that didn’t work out for the project it was supposed to? That’s the story behind the LED strips in this lovely blinkenlights choker by [Ted].

The choker itself is a 15 mm wide leather strap with holes punched in it. According to [Ted], the hole punching sounds like the absolute worst and hardest part to do, because the spacing of the holes must be greater than that of the LEDs to account for flex in the strap. [Ted] tested several distances and found that there is little margin for error.

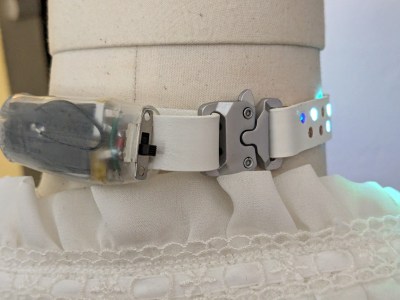
Controlling those blinkenlights is a Seeed Xiao S3, which fits nicely behind the neck in what looks like a heat shrink tube cocoon. [Ted] chose this because there was one lying around, and it happens to be a good fit with its LiPo charge controller.

The choker runs on four 300 mAh LiPo batteries, which makes for more bulk than [Ted] would like, but again, sometimes it’s about what you have lying around. Even so, the batteries last around two hours.

Sometimes it’s about more than just blinkenlights. Here’s an LED necklace that reports on local air quality.