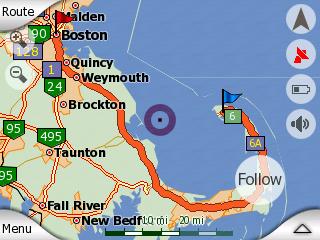
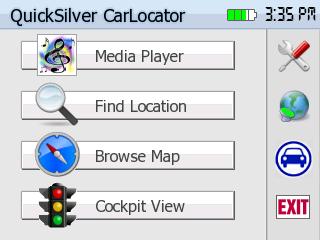
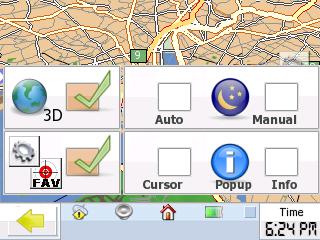
Restore DVD for Mio C230

Although I’ve always refrained from doing so in the past,  it seems to me that there should no longer be any harm in providing a backup copy of this “outdated” software DVD (within the U.S. only though) in exchange for a $10 donation to my Coffee Fund (free S&H).  You will also be emailed a link to the Canadian map file that I feel should also have been on the DVD.

  • There seems to be no other means of obtaining this DVD for those wishing to restore their GPS unit
  • The Mio C230 is no longer available from retail stores
  • The iGo map data is 6 years old (as is the Canadian map file)
  • The software / maps are no longer supported by Mio, nor iGo
  • The ISO file is too large to upload / download in my Mediafire account
  • Since this blog is probably the only C230 information source remaining, I keep getting requests for a source of this DVD so that bricked units can be restored.

[UPDATE 5/9/2016] This offer no longer applies as I no longer have my Mio C230 nor the DVD disk.

Comments (16)

Unlocking the Mio C230 – Version 3.6 with Storage Memory Enhancer & Route, Theme, Screen, Settings and Skins Management

Screen choices


The long-awaited Version 3.6 update to Ameridan’s (that’s me) Mio C230 Unlock includes many refinements since Version 3.5 was released.   Thanks go out to all who’ve contributed to this release (even if I unintentionally forgot to give credit to you), including hak for submitting the script changes for the large target street font that “sticks”, wildbill for redoing all of the icons, and tim rude for providing the new, improved Launcher program and the storage memory enhancer.

Amida’s Version 4 Unlock may indeed be easier to install (and Undo), but not having ever tried it, I will not attempt to compare the new version of my Unlock to his, other than to state that they each have their own pluses and minuses over the other, depending on your needs.   I simply like this Unlock and appreciate that I too have a loyal group of users that have encouraged me to keep updating and sharing the results.

  1. The new C230 Launcher that Tim Rude provided so that Registry settings work, Backlight and Taskbar settings behave, Windows Explorer doesn’t require special handling after a hard reset, and normally, neither a soft or hard reset are required after a USB connection of your Mio to your PC.
  2. My CAB installer package is included so that you can install compatible programs that are distributed via CAB file.
  3. Storage Memory enhancer is included so that your allocation will be 4MB, rather than the default 500KB, resulting in reliable performance since you should no longer be running out of memory.
  4. DST fixes so that you no longer need to manually set your time and date after a hard reset, if the auto-sync option is enabled in MioMap.  After a hard reset, the time may be off by one hour until the second time you have acquired a GPS signal with MioMap or BeeLine.
  5. New screens to accomodate additional programs.  Games, Tools, and Apps. along with a Screen Choices” menu that has been further refined to allow you to select a theme that will be applied to all of these desktop screens in unison.   The Clock screens remain, but the font size of the AM / PM indicators have been reduced.
  6. My BeeLineGPS package is included for straight-line navigation and Geocaching.   This is provided on a 30-day evaluation basis, so I encourage you to register your copy here if you like the program. 
  7. I’ve also included Metro,  a great non-GPS program that provides you with public transportation schedules and guides for all major cities of the world.
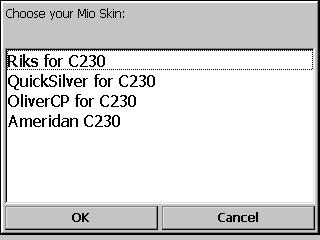
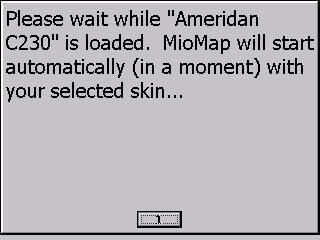
  8. My version of a Skins Choices” menu (based on Mike FFI’s) to manage your favorite skins saved on your SD card and be able to choose them on the fly to further personalize your C230! 
    capscr0093.jpg
     
    capscr0094.jpg
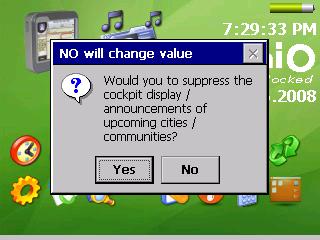
  9. A Settings Choices” menu that now allows you to choose the menu text font size and suppress upcoming cities and communities in the navigation bar.
    capscr0089.jpg
  10. The latest version of Ameridan’s (me) C230 skin (an enhanced Mio factory skin) and my QuickSilver CarLocator skin (1.49b1) that has a “Media Player” screen built-in to play audio files from within MioMap (using TCPMP)  (and the large-font feature for target street that has been repeatedly requested) is also included..   These will be installed in the Skins folder of your SD card.    You can add your own additional favorites to this folder as well.

  11. A set of document viewers so that you’ll be able to peruse just about any common document type out there.   The set includes:  a PDF document viewer , another Image viewer, a Powerpoint presentation viewer, an Excel document viewer and a Word document viewer.

From any of the desktop screens, you’ll be able to access the ”Tools” screen, the “Games” screen, the new “Apps” screen  or your chosen “Clock” screen.   You might also choose a clock or desktop default screen and never access the others.    All served the way you like it!

The largest advantage is the ability to pre-plan upcoming vacation trips, business trips, delivery routes, etc., save those routes, and activate them at your convenience.

Games  Wink [;)]

In addition to Solitaire, Freecell, Klondike, LightsOn, Tetris, Chess, and Shift which are new in this release, the games included in Version 3.5 are all available from the Games screen.

Aquellaballis a JezzBall-like game for PocketPC.Mini View

Just draw a line with the stylus to have a vertical or horizontal line spread across the whole screen. If a ball touches the line while it is being drawn, it will be cancelled and you&ecute;ll loose alife.

Cover over 75% of the screen and make it to the next level, with 1 more ball.


 Mini ViewTest out your reflexes and Stylus control with BallBreaker !All the balls are shooting strait at you, and you just can’t touch them…   The only solution is to explode them against the grey squares…The more balls you break, the more you’ll have coming at you.


 Mini ViewCaissesis a Sokoban clone that includes 500 levels and 14 different backgrounds and themes.   The original version of Caisses is Caisses DS, a Nintendo DS homebrew coded by Kukulcan.In this game, you are a warehouse keeper, and your mission consists in arranging boxes by pushing them onto their designated locations…Boxes can be pushed, but not pulled, and the controls are simple : either point to the spot to move to with the stylus, or use the directional pad !


 Mini ViewPipes is a classic in the puzzle world.Select one of the 6 difficulty levels (actually 12 as for each you can activate wrap mode, making it MUCH harder…) and try to light up all the flowers…Turn the pipes by clicking on them, and try to bring water throughout the whole board in as little time as possible.


 Mini ViewSkinz Sudokuis a Sudoku game which combines good looks and ease of use…It offers beautiful graphs by Daydream, with 4 different skins depending on the difficulty level.
The game’s particularity is that it offers 4 different input methods for you to select from, to fit everyone’s needs…
– Wheel : Select a number from the number wheel around the tile you touched. You can also set a hint by touching one of the corners…
– Square : Same thing, but in a simplier/more compact layout…
– Bar : Select first which number to plot, and then touch the grid to put it anywhere…
– Writing : In this mode, touch a tile to have it zoom, and just write down the number you want !   You can also add small number hints at anytime, with every input method, using the top right button, or undo if you make an error…All the levels are randomly generated, so don’t expect to finish the game soon


Additional Games are available here.

Route Management

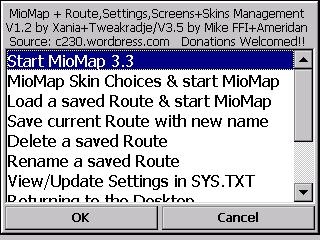
iGo 8 is reported as having this feature built-in, but I was the first to make this feature available in the C230 (with thanks to Xania for the initial work), by allowing routes to be saved and loaded by menu selection.

capscr0092.jpg
 
capscr0110.jpg

With the Route Management menu, you can not only preplan your routes, but by

  • Exiting
  • Saving your route with a descriptive name
  • Restarting MioMap back up again with that route still in memory or loading that route into memory at a later time
  • Using the Edit Route screen and reversing the order of your waypoints
  • Exiting and Saving once again with a different name representing the return trip
  • – Voila – you’ve got your return trip available in the menu without inputing all of your way-points once again.

Use the GPS power button now available in the enhanced skins to temporarily turn off the GPS chip, so that when pre-planning routes not having anything to do with your present location, the Route recalculation will not mess you up your itinerary.

The Ameridan skin (included) for the C230 includes all of the tweaks mentioned in this blog including:

  • Exit Door button needed if you are unlocking your C230.
  • Revised start screen identifying the source of the modified file.
  • Export Track button allowing you to export the track log into a gpx file directly.
  • Easy Route option described here.
  • GPS Screen with the globe rotated such that North America is proudly shownand the GPS Power button needed for uninterrupted general map viewing and Route preplanning without Auto Route Recalculation kicking in.

Starting with Version 3.3, the menu script creates automatic  entries to the SYS.TXT file needed for this menu to function. You no longer need to run through the setup process prior to using the menu.


I’ve gone through a lot of coffee again on this release ( the best one yet! ) and if you are pleased with the results and haven’t already done so, kindly consider a small donation to my coffee fund.


Oh, and don’t forget to check out my Mio-C230 StickiNotes in the right column where blog items and other tidbits readers provide will be easy to find.


Unlock Version NXT-R3.6

[BEFORE YOU FOLLOW THE PROCEDURES TO MODIFY YOUR MIO C230, KNOW THAT YOU MIGHT RENDER YOUR C230 UNUSABLE AND YOU MIGHT VOID YOUR WARRANTY. YOU DO THIS AT YOUR OWN RISK.]

Installation procedure

  1. Turn on C230 and connect it to the computer using a 5-pin Mini-B USB 2.0 cable (not included in the package) like this Belkin USB cable.
  2. C230 will show up as a flash drive in My Computer as Mio Device. Mine is assigned as F drive. I’ll use F drive in the following steps. Substitute it with the actual drive letter of your system. If you have a SD card in the slot, it shows up as well – in my case as G drive.
  3. Rename the folder F:\MioMap\MioMap to F:\MioMap\MioMap2.
  4. In order not to get the message ”destination full”, you may need to free up some space on your flash disk – See Note 2.   Also, it might be a good idea to now make a backup copy of the original DATA.ZIP file in F:\MioMap\MioMap2 (as well as your Routes folder in F:\MioMap\MioMap) to your PC or Storage Card.
  5. Download MioC230_NXT_R3_6.zip
  6. USA MioC230 users – The enhanced C230 skin as well as Version 1.49 of the Quicksilver CarLocator skin are included in the download.   Owners of the European C230, please review this page and Note 4, before Unlocking for information on using this Unlock on your units. You can modify your DATA.ZIP file yourself – See Note 3.
  7. Extract the files from your Unlock download and find the three folders MioMap,  Script,  and Storage Card folders. 
  8. Copy MioMap to F:\MioMap\ and copy Script to F:\ as in the screenshot. Don’t speed through this step – it’s got to be done as described!
     
  9. Copy the five folders within Storage Card folders which are: BeeLineGPS, Metro, Skins, uBook and Games to the root of your SD card.   If you backed up your Routes, copy them back into  F:\MioMap\MioMap\Routes.
  10. If you would rather use the “iPhone-look” icons without the English sub-text, then replace the icons in  \My Flash Disk\Script\Icons  with alternate icons, some of which are available here and within the comments for the Version 3.4 Blog.
  11. Disconnect Mio C230 and do a hard reset by sliding the switch on the rear of your C230 to OFF and back to ON again.
  12. After calibrating the touch screen, the initial Unlock script will automatically run AUTOPATCHER (no menu selection necessary), soft reset and present you with a desktop screen.   It is important that you select a skin that has an Exit button before launching MioMap, so go into the MioMap Management Menu (first large icon in top left corner) and choose an enhanced MioMap skin (Ameridan C230 is suggested initially), unless you are manually modifying DATA.ZIP per Note 3 below because you are unlocking a MioC230 that isn’t the USA or Canada version.    

Note 1: If you wish to undo the enhancements and return the Mio C230 back to factory condition:

  1. Turn on C230 and connect it to the computer using a USB cable.
  2. Rename the folder F:\MioMap\MioMap to F:\MioMap\MioMap3 (or delete) and rename the folder F:\MioMap\MioMap2 to F:\MioMap\MioMap
  3. Copy back any map files you may have deleted or moved to your SD card and restore your DATA.ZIP file.   The SYS.TXT file shouldn’t need to be restored.
  4. Disconnect the cable and hard reset C230 using the switch on the back of the unit.

Note 2: In order not to get the message “destination full”, you’ll need to free up some space on your flash disk by moving at-least 12MB of map files to your SD card by creating a MioMap folder and within that folder a maps folder so that the path appears as G:\MioMap\maps. Choose a combination of map file(s) you’re not accessing every day (in case your SD card isn’t always inserted) from F:\MioMap\MioMap2\maps and move them to the maps folder on your SD card. MioMap will see them after a hard reset as if nothing happened. Or you could delete them (or copy to your PC) if you choose not to use a SD card at this time, since it’s easy to explore your MioMap DVD and copy them back to the original folder or a SD card later, if needed.

Note 3: Instructions to modify your DATA.ZIP file yourself (from Amida’s Hack #2). 
[Not normally applicable for US and Canada units any longer, because Skins Management will allow you to choose Skins that already incorporate the needed revisions]

  1. Make a backup of your original DATA.ZIP file. The file is F:\MioMap\MioMap2\DATA.ZIP .
  2. Unzip the original DATA.ZIP to your local hard drive.
  3. Edit the file mio\common\ui\default_setup.ui in the uncompressed files.
  4. Find the following line and delete it. Note that this is for C230 only. You might need to edit/delete other line for other models.
    runif vDeviceType “MIOC230″ ‘btn_exit_app.hide’
  5. Compress the files back into DATA.ZIP again.
  6. Copy the DATA.ZIP from step 6 to the F:\MioMap\MioMap2\ directory.
  7. If you get a ctype.dat error as has happened with some users, either try again or download the file instead. When it comes to zipping the file back up, it has been learned that WinZip version 11 (10 is OK though) is not compatible with MioMap. I use WinRAR and I choose “best” compression but I’m not sure if that really matters.

Note 4:  A modified version of my autopatcher.mscr file is available here (simply copy over the original file in your MioMap folder) http://www.mediafire.com/download.php?dioqutml3ji   that will eliminate the loud Windows startup sounds.

The first (quiet) windows startup sound after a hard reset can’t be changed, but the subsequent loud ones will no longer occur during the second bootup and after soft resets.


For now, please refer to the Version 3.5 instructions here (which shouldn’t be too much different), as well as the Metro guide here, and the CarLocator manual here.

Comments (143)

2010 in review

The stats helper monkeys at WordPress.com mulled over how this blog did in 2010, and here’s a high level summary of its overall blog health:

Healthy blog!

The Blog-Health-o-Meter™ reads  Wow.

Read the rest of this entry »

Leave a Comment

C-Series Map Update for North America is now available!

The new North America map update for Mio C-series models (C220/S, C320, C520 and C720t) is now available! The new maps are available directly from Mio on DVD (due to the large file size). Please call Mio Customer Support at 1-866-646-4477 (Monday~Friday 9:00am~6:00pm CST) for more details. The new map update is designed around a new user interface called Mio More Express (MME).

Just got this announcement today from Mio, but it doesn’t seem to be intended for the C230 and it probably wouldn’t be compatible with the Unlock package based on the iGo software anyways.   Those of you that have been requesting map updates might be interested in this anyways, and since it is compatible with the C220, it may work with the C230, but you are on your own should you wish to try it out.

[UPDATE] Here is a  link  to details on the Map update.  It doesn’t seem to be of much use to us Mio C230 owners after all  😦

Comments (7)

Embedded Visual Basic 3 runtime & GPSTimeSync utility for C230

Tim Rude has put a significant amount of time and effort into a utility that reads the date and time from the GPS chip and relays that to the OS clock (the time displayed in the taskbar of your C230, as well as in any programs displaying the time).  The GPS chip has its own real-time clock that is unaffected by a hard-reset.   Apparently, this RTC gets updated whenever a satellite fix is acquired (by MioMap, SirfTech, BeeLineGPS, etc.) and remains reasonably accurate even when it’s been a while since the last satellite fix.

He has also written a program that installs eVB (embedded Visual Basic) Version 3 runtime files needed to accomodate his utility, and I think I speak for all of us in thanking him for sharing his efforts in this Blog!!!

He writes:

I’ve finally gotten back to working on the eVB runtime installer and have it all put together into a nice little easy to use utility.

You can download the eVB3Setup.zip from here:

http://www.mediafire.com/?0aizndbexrm

It automatically installs and registers the necessary dll files so that programs written in embedded Visual Basic 3.0 will run on the Mio C230.

My GPSTimeSync utility is also ready for download too. It requires the eVB runtime files.

You can download it from here:  [edited by c230 to link to the latest version]

http://www.mediafire.com/?mm2iu3bwbzy

When you run GPSTimeSync for the first time, it needs to find your GPS port so it automatically opens the Comm Setup screen. Click the Auto-Scan for GPS Port button to let it find the correct Comm port and Baud rate for your device. Once it finds it, click OK. You won’t have to do this again.

Then the upper half of the screen will show the GPS time (in UTC or Greenwich Meridian Time zone). Click the Hour + or Hour – buttons to align it with your time zone. Once you’ve set this once, it remembers the hour offset for future use, even after a hard-reset.

The lower half of the screen will show what your Mio’s clock is currently set to. Simply click the Set Time button to set the date and time to match the GPS time and exit the utility.

Since the GPS chip keeps the current time even after a hard-reset, this utility makes it very easy to quickly set the Mio’s date and time after a hard-reset.

However, the eVB runtime files won’t survive a hard reset, since the Windows folder gets purged. That means you would need to re-run the eVB setup after each hard-reset in order to restore them.

For that reason, I keep the install directory on my SD card and the last step in my Autopatcher.mscr is to call the eVB installer.   [See the first comment below for additional information]

Enjoy!


—————————————————————————

Tim has subsequently provided this link where eVB development software can be (legally) downloaded: 

http://cobweb.ecn.purdue.edu/~vip/dev_tool.html


Comments (74)

CarLocator 1.49 Skin with Audio File Player (TCPMP skin) built-in!

Version 1.49b has just been made available on 5/27/2008 that incorporates hak’s code to make the large target street font selection permanent, rather than reverting back to the small font after starting each new segment of the trip.


Play your music files with this skin &

a stylus is not required!! 

The WordPress editor has messed up the original post to the point where I was unable to even add one sentence, so thanks to Google cached pages, I have recreated the Blog page and pasted the 35 comments that were attributed to that Blog page into this page so that they wouldn’t be deleted.  My apologies to those that had problems getting the player buttons to function, as the editor had deleted a portion of the instructions.  I hope WordPress either goes back to the original editor, or fixes the present one, as garbage is entered into the code each time the author edits his Blog, and I do a whole lot of that. 🙂

Note that I’ve included instructions and a folder containing just the skin files that have changed for those that might wish to add the Media Player feature to their own skins.

 Enjoy, and if you appreciate the hack, consider a donation to my Coffee Fund   

Please know that playing TCPMP files from within MioMap is intended for audio files only, and will not function for video files, which might suffer in performance with MioMap running concurrently anyways. 

(The title screen artwork is by Art Fitzpatrick and can be purchased here.   I just felt that a link would be the right thing to do, in return for borrowing part of this great painting – ’69 Pontiac GTO at Hydra Island   )


Best Quicksilver skin yet!!

Newest EXCLUSIVE feature of the CarLocator skin…

Well, I knew it could be done, and it seems to work flawlessly.   As far as I am aware, I may have the first TCPMP skin, at least for MioMap.  

Whether your media files are DivX, XviD, MP3, wma, Matroska or MP4, The Core Pocket Media Player” (TCPMP)” is the best open source media player to provide a solution for playing all your digital media on a wide range of mobile operating systems and devices. Possibly the best media player for the Mio GPS units!!  

Clicking on the Media Player button…  

brings up the Media Player “skin

.

The File button brings up the TCPMP menus in case you want to set-up playlists, options, etc.    You can adjust the Player volume here as well, independent of the Master Volume and other MioMapvolumes, so that the music can be in the background, or the foreground.  Once you are done, just Exit out of TCPMP normally (without hitting Play, as will just stop again anyways) and you will be returned to MioMap.

All of the other buttons should be obvious – 

  • Play / Pause
  • Fast Forward / Normal
  • Next (applies to Audio books, playlists, etc)
  • Previous (applies to Audio books, playlists, etc)
  • Stop

and they will flash the Player on for 1 second and return back to MioMap automatically.

You can return back to Navigation screens with your music in the background!

Another EXCLUSIVE feature of the CarLocator skin…

Clicking on the Save Car Location button saves 4 clicks…

and takes you right to this screen…

Click on Coordinates, then Done, and your Car’s present parked location is in memory.

To locate your parked car…

.


Just to review some of the QuickSilver CarLocator Version 1.48 revisions…

(see the 1.48 Blog for a complete review of that version)

  • Right third of Navigation bar changed from Speak Last Command to Large Target Street font
  • Middle third of Navigation bar remains as Speak Last Command
  • Left third of Navigation bar no longer serves as shortcut to Route screen


  • Added “Clear Pins” button to History screen, and changed Clear button text to “Clear All” 
  • Settings button added for quick access to Cockpit Settings


This skin by default names the two favorites Home and Car, and the main screen has a new button to program your current location and assigns it to Car, the intent being that it will facilitate finding your Car later.

This is a skin alternative, not an Unlock package, and can be used as a new skin without unlocking – just don’t use the Exit button.

To avoid a lot of confusion when doing Route preplanning, stay in the Browse Map mode (with Auto-Recalculation turned off), since Cockpit mode is always focused on your current location and will appear to be ignoring your route.


   Version Log…

QuickSilver Reborn – A MioMap 3.3 Skin
Created By Ashwin Wavde
Inspired by Quicksilver for MioMap 3.2 by Matt Mullins (roscoe)

QuickSilver Reborn 1.0
* QuickSilver 1.0 for MioMap 3.2 modded for MioMap 3.3
* Added Cockpit Bar transparency
* Fixed turn distance guide visibility
* Various other improvements

QuickSilver Reborn 1.1
Compiled
2:56 PM 4/08/2007

*Adding compatability for split-screen data.zip

QuickSilver Reborn 1.3

*Added simple static car over arrow

Quicksilver ‘66 for C230
*Icons redone by CD
*GTO car over cockpit arrow –  CD
*added toggle buttons cockpit view <-> browse map view – CD
*config folder fixed for C230 (roundabouts weren’t being announced) – ameridan

Quicksilver CarLocator for C230 1.45
Compiled
6:00 PM 2/15/2008

*2nd favorite tailored to Car location, rather than Work – ameridan
*All Favorite icons redone – ameridan
*New shortcut button on Main Screen to input location coordinates of parked car – ameridan

Quicksilver CarLocator for C230 1.46
Compiled
7:30 PM 2/27/2008

*added the the Binocular (Fit Route view on screen) and Route calculator (Recalculate toggling method each time) from the Olivercp Skin to the Browse Map screen – OP
*added POI button to cockpit screen – OP
*redid POI button to match others – ameridan

Quicksilver CarLocator 1.47
Compiled
12:00 PM 3/6/2008
– ameridan
*toggle for displaying POI button added to Map Settings – OP
*redid flyover button – ameridan
*added pin/unpin button to browse_map cursor popup – ameridan

 
Quicksilver CarLocator 1.48
Compiled 4/1/2008 – ameridan
*fixed the Stop Recording Track Log button on the map screen that resulted in an error – ameridan
*flyover button tweaked – ameridan
*right third of Destination bar changed from Speak Last Command to Large Target Street font – OP
*middle third of Destination bar remains as Speak Last Command
*left third of Destination bar no longer serves as shortcut to Route screen – ameridan
*digital font used for Clock, Speed, and Altimeter – OP and ameridan
*Set FavPOI script written to choose MyPOI group as favorite -OP
*cursor button text changes from “Cursor” to “Close” when menu bar is opened – ameridan
*back button changed from small pale green arrow to larger yellow arrow – ameridan
*added “Clear Pins” button to History screen, and changed Clear button text to “Clear All” – ameridan
*Cockpit screen & Map screen menu bars – back button changed from down arrow to left arrow – ameridan
*****************************************************
MAJOR UPDATE TO BROWSE / NAV MAPS SETTINGS SCREEN – ameridan
*Settings button added for quick access to Cockpit Settings
*display/hide toggle button in Cockpit settings menu (in place of zoombar display/hide) for both FavPOI and Cockpit Settings buttons
*added toggle option in Cockpit settings for auto day/nite in double-button with manual toggle
*added toggle option for Cursor menu popup in double-button with Info show/hide toggle
*added track recording start/stop button  in double-button with Manage track logs button – also serves as latge indicator   that track logs are RECORDING.

Quicksilver CarLocator 1.49
Compiled
5/1/2008
– ameridan
*added Media Player skin into the CarLocator skin to allow playing AudioBooks, music, etc. from within MioMap.


Contents of download package:

<DATA.zip>This folder contains a complete CarLocator skin (ver 1.49) which features the TCPMP skin.

<Changed Skin files only>This folder contain only the skin files that changed for the Medai Player feature, in case you want to add the TCPMP feature to your own skin.  All references to “\My Flash Disk\Script\Player.exe” may need to be changed to fit your build.  The actual hidden button I’m using is “zoom_in_trans.bmp”, which is part of the Quicksilver skins.  If your skin doesn’t contain this bmp file, you’ll need to copy it as well from the Data.zip file or use something similar.  The buttons are hidden because of the z=0 parameter.  If youwish to view them for debugging purposes or to relocate on a different background, change to z=2 instead.

<Script folder files>This folder contains the actual MortScript files needed to interface with the Player.  They were written with the C230 in mind, which is 320 x 240 format.  Other formats may need to be tweaked to function properly.  Again, all references to “\My Flash Disk\Script\Player.exe” may need to be changed to fit your build.  I’ve written them in such a way as to not cause any issues if the Player is already running or playing or if the Player is not actually on, when the scripts assume it is.


Installation Instructions:

Version 1.49 download is available HERE (may not be compatible with EU units; intended for US & Can units only)

1.   The file DATA.ZIP   should simply replace (after backing up your original) AS-IS (don’t unzip):


  • \My Flash Disk\MioMap\MioMap2\DATA.ZIP, if C230 is unlocked
  • \My Flash Disk\MioMap\MioMap\DATA.ZIP, if C230 is locked 
  • or if you are using a Skin Changer (my Routes Menu contains this feature), just drop the DATA.ZIP into \Storage Card\Skins\QuickSilver CarLocator 1_49\ 

2.   All of the files in the Script folder need to be extracted into \My Flash Disk\Script along with Player.exe (which is the executable for TCPMP), which should already be there.

As an alternative, Greg has already converted the TCPMP links from \My Flash Disk\Script\Player.exe to \Storage Card\Script\Player.exe and made his work available for others that have a SD Card Unlock (like Amida’s Ver 4), rather than a Flash Disk Unlock like mine.   His converted DATA.ZIP is available here and the converted scripts are available here.   Thank you Greg!!

3.   An updated DATA.ZIP for Version 1.49b is available here with the additional code that hak wrote to make the large target street font selection permanent, rather than reverting back to the small font after starting the next segment of the trip.   Instructions are the same as step #1.

After installing DATA.ZIP, you should set a Favorite POI group before clicking on the FavPOI button on the Cockpit screen or you may get an error message that ends the program and requires you to start it up again. 


As an option to try out Dominique’s Skins trick in an unlocked C230, copy the “SKIN” folder from the  Version 1.46  download into \My Flash Disk\MioMap\MioMap2  (or the contents of DATA.ZIP within should be added into  \My Flash Disk\MioMap\MioMap2\SKIN\DATA.ZIP).    See the Blog on Version 1.46 for more on this.


35 Comments (attributed to the original post)


  1. Andrew said,

    May 1, 2008 @ 11:04 pm ·

    Such a great job on the skin! I just have a couple of issues that may or may not be something on my end. I switch the player on, use the Open File button and pick something from my flash card and it plays full screen. Now, in order to get back to the Nav part, I have to exit out of there, and it returns me to the Media player. If I hit the play button, I see the video I had open before for one second, and then it stops completely and shoots me right back to the Media player screen. I thought maybe the video audio would start up when I went to Cockpit/Map view and it didn’t seem to do that either. I understand the video won’t be playing in those views, but I know you made it so the audio could – just not sure why it won’t on mine. Also I am wondering why hitting the Play button doesn’t leave the movie/song playing for more than 1 second.

    Amazing job of even getting it integrated – didn’t even think it was possible!


  2. Lords said,

    May 2, 2008 @ 2:35 am ·

    hi… thanks for this new version…!!!
    but… my error message:

    Window “TCPMP” could not be found
    Line:
    Show (”TCPMP” ;)

    Why?


  3. gutierrez said,

    May 2, 2008 @ 9:52 am ·

    New version!!!! great!!!
    my error msg:

    There is no application associated with “PlayerTCPMP_start”. Run the application first, then open this file from within the application.

    why?
    Thanks!!!


  4. c230 said,

    May 2, 2008 @ 1:12 pm ·

    Andrew,

    I had never tried video files, but it makes sense that TCPMP would need to be the active window to work properly. My skin was designed with AUDIO only in mind anyways. And if you’ve already been playing songs, you wouldn’t need to use the File button. The File button does come in very handy as a means to change playlists, songs, volume, etc., but as you say – you do need to exit out after and hit the play button from the Media Player skin to resume.

    If playing an audio file from the Media Player skin, play should work as expected. I intentionally flash the player for a second, but the audio should keep playing as the screen reverts back to the Media Player skin (but only for audio files)

    I’ve clarified the Blog to indicate that the Media Player skin is designed for audio files only:

    My skin will probably only work with audio files though. If you are going to watch video files, you probably wouldn’t want MioMap running at the same time anyways.

    Lords and Gutierrez,

    Apparently, you are not using my Unlock package. Thanks for pointing out that the scripts will result in an error message if Player.exe isn’t found in \My Flash Disk\Script\. I’ve added more clarification to my Blog regarding this requirement as well. If you are using MioPocket or some other SD card Unlock, the path statements all need to be modified to accomodate. As I told amida in the previous Blog, I’d need some fancy generic code that would find TCPMP in the registry and use those settings, particularly since TCPMP isn’t in the registry until you run it once after each hard reset.


  5. Greg said,

    May 2, 2008 @ 3:46 pm ·

    c230

    Your QuickSilver CarLocator 1.49 with the Media player works fine for me. I had to like you said to tweak all references to “\My Flash Disk\Script\Player.exe to “\Storage Card\Script\Player.exe because of me running your unlock package from by storage card which is 8gb. Great work. Can you put more in detail on your “Changed Skin files only” folder. If I want to modify other Mio skins, step for step.


  6. c230 said,

    May 2, 2008 @ 4:00 pm ·

    Greg,

    48 downloads in the first day! If you (or another Blog reader that’s already done the same) could package up your version of the DATA.zip and the Script files (and perhaps upload to MediaFire), I would be happy to publish the link on my Blog. I could then have two links to the download that a reader would select depending on the location of their Player.exe (TCPMP).

    This would save many using Amida’s SD card Unlock (as an example) from having to convert all the links, as you just did. And thank you for the positive feedback!

    Your second suggestion isn’t easily doable, because you usually can’t simply replace ui files, unless the skins are pretty compatible (like other Quicksilver skins). To simplify however, the last third of the Main_Menu.ui is the Media Player code you’ll need to copy and paste into some ui of another skin (some skins don’t even have a main menu) and you’ll need a button somewhere to invoke the Media Player skin [BUTTON xxx x=20 y=180 bmp=”mio/320_240/map_player.bmp#2″ onRelease=’NEXTSTATE ST_PLAYER’ text=”Media Player” w=106 fonttype=mio_main_font font=”tahoma” fontsize=16 align=”LEFT+75″ valign=”BOTTOM-18″ twolineoffset=6]
    .


  7. Greg said,

    May 2, 2008 @ 6:34 pm ·

    c230

    Sounds indepth with adding the media player to skins. I wanted to add the TCPMP media player to the Olivercpskin. Can this be done?


  8. c230 said,

    May 2, 2008 @ 6:42 pm ·

    As skin changes go, this one would not be too bad, but it is not a “beginner” project. Why don’t we give it a few days to see if someone else takes it on. If not, I could take a stab at it. The main new graphic file we’d have to come up with is a compatible button to link to the Media Player page.

    Three months ago, I remember being leery about adding the Exit Door option to the stock skin and now I’ve got a unique skin published, so take a stab at it. The worst that happens is you revert to your backup / original file.


  9. Greg said,

    May 2, 2008 @ 8:13 pm ·

    c230

    This is the link to data.zip modified for sd card use with TCPMP http://www.mediafire.com/?1cpbzlmo5ho and this is for the Script file for use with sd card http://www.mediafire.com/?tnztotbdxmo.

    (\storage card\script\player.exe)


  10. c230 said,

    May 2, 2008 @ 9:43 pm ·

    Thank you for sharing Greg! I’m sure many others, including perhaps Lords and Gutierrez might appreciate the revisions. I’ve also added those links into the Blog download instructions.


  11. Lords said,

    May 3, 2008 @ 1:38 am ·

    Its perfect now!!!!!!! THanks!!!!!


  12. hulckrcontl said,

    May 3, 2008 @ 1:32 pm ·

    my “speed limit” option always revert back to ON and “turn distance guide” always reverts to OFF after logoff…

    what’s wrong?

    thanks for this new version.


  13. c230 said,

    May 3, 2008 @ 6:21 pm ·

    If you are using my Routes Menu, this section controls the Speed Limit behavior,and all you need to do is uncomment it (you could also add the line to your autopatcher, or directly into your SYS.TXT:

    # The next line updates SYS.TXT to hide the speed-limit (mostly for Europeans, since 2007.1 North American maps don’t have speed limit data)

    #IniWrite (SYSFILE, “debug”, “show_speed_limit”, “0″ )


  14. Carlos said,

    May 5, 2008 @ 5:06 pm ·

    Hi friend… how are you?
    Please tell me: how to show the letters “AM” and “PM” in my clock?
    In my C230, 01:00 and 13:00 are same things…

    Thanks..


  15. c230 said,

    May 5, 2008 @ 8:26 pm ·

    Fine, thank you, Carlos.

    Go to Settings, Language, Set Date & Time format and select under Time Format: 12 hours with AM/PM. I agree, you wouldn’t expect clock setings to be under “Language” ) but I guess someone figured there’s no more room on the General Settings page…


  16. Andrew said,

    May 8, 2008 @ 1:19 am ·

    Was the bigger font for the next street name on the top bar something that you were able to look into or was that someone else’s area of expertise? I find myself squinting and needing to lean really far forward to see what street is forthcoming and would rather just set the street to be shown in a bigger font and leave off that other info.


  17. c230 said,

    May 8, 2008 @ 10:44 am ·

    It has been resolved since my version 1.48, but you have to tap the right side of the green bar to activate it. The hidden button hides the other info just as happens when you approach that intersection and displays the street in the larger font. Nobody is increasing the font size any further on the 320×240 displays because longer street names will get cropped off.

    Unfortunately though, the setting doesn’t stick, and I don’t know that we want to permanently hide the other data, so the code isn’t changing for now.


  18. opop said,

    May 8, 2008 @ 9:37 pm ·

    very nice update. nice job. ;)


  19. c230 said,

    May 8, 2008 @ 10:16 pm ·

    thanks OP. have you done any tweaking lately?


  20. 230 italy said,

    May 9, 2008 @ 3:14 am ·

    i have a c 230 unlocked.
    after i put the skin with Routs menu, it tryes to start the gps program but a fatal error occurrs…
    fatal error occurred restarting!!!

    and then i have to use the dvd to restore everything…

    how can i do?
    pls help couse i would like to use your wonderful skin


  21. Andrew said,

    May 9, 2008 @ 5:37 am ·

    Yeah, no I wasn’t suggesting anything permanent as far as the font size goes, just something for those of us who want it bigger most of the time. I understand that it is a question of who coded that part of it to come forward, but I am finding that the voice prompts come too late sometimes with this GPS (either because of MIO or because of something I’ve tweaked somewhere in the voice department) and so to avoid screwing myself up, I have to look at the street name or exit name/number to be sure I don’t miss it. That is why the size of the font is most important to me right now and I do notice that it gets bigger each time you approach that street (that size is what I am looking for by the way) – I just hope we can one day find a way to make that stick longer than just one time so I don’t have to keep tapping that right part of the screen!


  22. c230 said,

    May 9, 2008 @ 7:23 am ·

    230 Italy,

    I know I’ve stated this before, but I’ll check this Blog to make sure it is clear that the EU C230 uses a different format in DATA.ZIP and the US version is not compatible. That is one downfall of having an all inclusive file, rather than an override (supplemental) file that you add to the SKIN folder to coexist with your existing DATA.ZIP.


  23. opop said,

    May 11, 2008 @ 8:30 pm ·

    I have been on the road working hard . but i am working on something.. I keep you posted. )


  24. Brad said,

    May 15, 2008 @ 10:11 pm ·

    Great skin! I am running amida168’s unlock release 4.1 off an sd card and have been unable to get the Media Player to work though. I have tried using the data and script files posted by Greg for the sd card unlock with no luck. Does anyone have this working off of amida’s 4.1 release? Any help on what I need to do to get it to work would be great appreciated.


  25. Guga7 said,

    May 18, 2008 @ 8:09 am ·

    It seems to be great. Sorry for this simple question:

    I’ve unlocked my Mio C230 with the “Unlocking the Mio C230 – Version 3.5 with Route, Theme, Screen, Settings & Skins Management”. Then I’ve installed this “QuickSilver CarLocator ~ ver 1.49 with Media Player skin built-in!” by just copying the data.zip file to the MioMap2 folder.

    How do I make sure that TCPMP is installed as \My Flash Disk\Script\Player.exe? Where do I get a TCPMP? There is a player.exe on this folder, is it the TCPMP?

    Every thing is working fine but there are no Media Player and Save Car Location buttons. What have I done wrong? Thank you.


  26. c230 said,

    May 18, 2008 @ 8:55 am ·

    Guga,

    As you may have discovered, yes TCPMP is Player.exe and you should not have had to do anything additional to use the skin.

    Since you are using my Unlock though, it would be much easier to use the Skin Changer feature by copying the DATA.ZIp to the Skins folder in your SD card and then selecting the CarLocator skin.

    It sounds as if you didn’t actually overwrite the existing DATA.zip file or didn’t soft reset after copying the file. I think it might be time for me to release Version 3.6 of my Unlock that will include the CarLocator skin and all of my most recent tweaks, including the new Launcher, DST tweaks, CAB file installer, etc., but you really should be good to go if in fact you did overwrite the DATA.ZIP file with the CarLocator skin.


  27. Guga7 said,

    May 18, 2008 @ 12:23 pm ·

    c230, thank you very much! Now it works! Last question, still simple: after I click on the “Media Player” button and on the “Switch Player On” the message “File and Play/Pause buttons enabled” shows. Then, if I click on any button, nothing happens, I just hear the click sound. Could you please tell me how to choose a song?


  28. Mark said,

    May 18, 2008 @ 12:54 pm ·

    Excellent page! The QuickSilver skins works great! Just one doubt: when I switch from the QuickSilver skin back to the C230 by ameridan skin and click on the Cockpit button the following message appears: Failed to open file mio/320_240/diriconbig.spr exiting application. What’s wrong? Thanks


  29. c230 said,

    May 18, 2008 @ 2:33 pm ·

    Unless you’ve been using TCPMP already, you’ll have to hit the FIle button and load a song or create a playlist and load that. Then just hit exit. Now when you hit Play, there will be something loaded in which to play. The alternative I use is to setup TCPMP with a playlist before running MioMap, so all the buttons have something to work with.


  30. Juliano said,

    May 19, 2008 @ 5:13 pm ·

    Hello! Very nice job, its amazing!!
    But I´m with the same problem of Guga. I had already created an playlist, but when click the play button, nothing happen ( I do not know what I´m doing wrong! Please can anybody help me? Thanks!!!


  31. c230 said,

    May 19, 2008 @ 5:40 pm ·

    Juliano,

    Thanks! If you think it’s amazing when it doesn’t work, wait till it works )

    Anyways, try to help me figure this out (in case there really is an issue to resolve). Get the playlist working in TCPMP by itself first, as the Media Player skin is really just accessing the program and then TCPMP is hiding behind MioMap. Once you have it working, start up MioMap and bring up the Media Player screen, then click on the “Switch Player On” , then Play (once only – if you click it twice, it may be Pausing the song). You should see TCPMP appear for one second, then hide again while your music is playing. Also, make sure the files in your playlist are Audio files (not video files that you are hoping to Listen to the audio portion). I reliably play wma and mp3 files all the time now.

    Do you have a US Mio C230? Which Unlock are you using?


  32. Brad said,

    May 20, 2008 @ 6:15 pm ·

    I am having the same problem as Juliano and Guga7. I have a US mio C230 and your unlock version 3.5 and have overwritten the Data.zip file with Carlocator 1.49. Everything else works great except for the Media Player skin. It will switch on and I hear clicks when I click on stuff, but nothing else happens. I have used the TCPMP player on the main screen and it works great. Got the playlist working and tried what you had suggested, but still the same result with the Media Player skin. Tried overwritting the Data.zip again to make sure that wasn’t it and still the same result. Any suggestions??


  33. c230 said,

    May 20, 2008 @ 6:40 pm ·

    Brad,

    Can you verify that all of the PlayerTCPMP files are in the \My Flash Disk|Script folder? Those are the scrpts that do the work. If so, from File Manager, double-click on PlayerTCPMP_play.exe and observe whether the current song of your playlist starts playing. (Acknowledge and ignore the error message “Window MioMap could not be found). If TCPMP does not fire up and start playing, then we can zero in on the problem.

    Now that I’m looking at my instructions, I may have been very unclear regarding these scripts and that may be the simple explanation as to why several of you are experiencing this glitch. I’ll take a close look now and revise if needed.


  34. Brad said,

    May 20, 2008 @ 7:10 pm ·

    That was the problem. I did not have all of the PlayerTCPMP files in the script folder. It works great now. Thanks for your help!


  35. c230 said,

    May 20, 2008 @ 7:44 pm ·

    I hate this “new improved” editor that wordpress provides. Every time I edit my Blog, it gets messed up and sections get lost. You probably noticed Brad that the bottom of the blog is a mess right now, and if I try to clean it up, something else will get messed up. GRRRRRR!!!

    That’s the reason Juliano and Guga are having problems – a whole set of instructions just disappeared since Andrew and others installed! My apologies to all.

    Give me good ol’ FrontPage, instead of these WYSIWYG editors. No wonder Amida branched out on his own.

    Anyways, you’re welcome Brad, and thanks for providing your feedback, rather than just thinking it was already reported. You gave me enough clues to zero in on the issue.


Comments (57)

TCPMP Skin within MioMap & Customization of the Player

New feature for next CarLocator skin

Well, I knew it could be done, and it seems to work flawlessly.   As far as I am aware, I may have the first TCPMP skin, atleast for MioMap.  

Whether your media files are DivX, XviD, MP3, Matroska or MP4, The Core Pocket Media Player” (TCPMP)” is the best open source media player to provide a solution for playing all your digital media on a wide range of mobile operating systems and devices. Possibly the best media player for the Mio GPS units!!

  rearranged layout

.

  original layout

.

.

The File button brings up the TCPMP menus in case you want to set-up playlists, options, etc.   Once you are done, you exit out of TCPMP normally and you will be returned to MioMap.   All of the other options, Play / Pause, Fast Forward / Normal, Next, Previous, and Stop flash the Player on for 1 second and return back to MioMap automatically.   You can return back to Navigation screens with your music in the background!

Feedback your ideas!

Once the Media Player is turned on, here’s some other ideas I’m considering:

  • Enable the track recording indicator / stop button on the Cockpit screen for pausing /resuming music play (what’s the likelihood that you’ll be playing audio and recording tracks at the same time?)
  • Expand the mute button so that it will mute Mio, then Mio + Music, then unmute Mio, then both
  • Reduce the Music volume when Samantha is speaking (or should it be the other way around 🙂 )
  • Adding a Screen Off button (shortcut to DPMS) to enable Audio only mode for MioMap with or without background music.

Customizing your Player

If you find yourself customizing your CORE Media Player and regret that it is all lost after every reset, the following may be useful to you.   For instance Hot Keys are assignable, and had they responded to the virtual keyboard, that would have been a useful means of sending commands to the Media Player.

The settings for TCPMP are stored in the WinCE Registry, which is overwritten on Hard Reset.
If you go in TCPMP -> File menu -> About and click on Dump Settings, a file DUMP.TXT will be saved to \Storage Card, and you can make the mental connection between the TCPMP settings and the Registry Entries. The Registry Key names are 4 character and the Entry names are numeric and can be found at
 HKEY_LOCAL_MACHINE\SOFTWARE\TCPMP.

You will then be able to save the entries that reflect your customized settings into autopatcher.
Example:


quote:


HKEY_LOCAL_MACHINE\SOFTWARE\TCPMP\EQUA
(399) 00000001 (1)


is this entry in Dump.txt

quote:


Equalizer (0x00049470)
Buffered(21)=No
(256):IN=empty packet format
(256):IN=NULL
(257):OUT=empty packet format
(257):OUT=NULL
(258):OUT=NULL
Enabled(399)=Yes
Volume normalization(400)=No
Pre-amp(384)=3
60Hz(385)=0
170Hz(386)=0
310Hz(387)=0
600Hz(388)=0
1Khz(389)=0
3Khz(390)=0
6Khz(391)=0
12Khz(392)=0
14Khz(393)=0
16Khz(394)=0


this is a possible method for writing to the registry.

quote:


RegWriteString (“HKLM”, “Software\TCPMP\EQUA\”, “(399)”, “1”)


Either make a .mscr file with your settings to run after a HARD RESET, or as I said previously, add them into your Autopatcher.mscr file.

If you find this tip helpful, might I direct you to the Coffee Fund link at the top of the right column?   Thank you.


This extra screenshot shows how the digital font looks in my Clock screen; I know – this has nothing to do with TCPMP, but I stuck it here anyways.  This is a Blog, you know.

Comments (13)

Windows Media 9 Codecs for TCPMP player

I’ve noted that C230 users occasionally want to play Windows Media version 9 Audio and Video files and get messages to the effect that the codecs aren’t supported by the TCPMP player.   Actually the plugin is probably already present, but the driver file(s) that the plugin is looking for isn’t, even though WinCE higher than 4.2 is supposed to include them (per Microsoft).   Found this question on amida’s site this evening and thought I’d package up the codecs to add into the Script folder of either of our Unlock packages to resolve the issue.

Oh, and bleep55, I’m the one with the Coffee Fund.    If this resolves your problem, I’ll take mine black, thank you.  🙂

Bleep55 said on April 23rd, 2008 at 7:43 pm

I am trying to add a video to the Mio. I am getting the error message : Video codec (Windows Media Video 9) not supported by the player. Is there something that needs to be changed in the Mio or does the video need to be reformatted? I get audio but no video…

…Donation to your coffee fund has been made. Thanks again.

The package is available here.

Comments (5)

Great article on GPS…

[NOTE: Overlook the fact that this article is written for Engineers – it actually explains things like why the GPS sometimes takes so long to lock in, especially after it’s been off for awhile (see the “Time for Acquisition” section).]

GPS Modules put Products on the Map

Jon Titus, Senior Technical Editor
Ecnmag.com – April 01, 2008

A GPS receiver can tell you where you are, but environmental conditions and design factors influence accuracy. 

When a product such as a child locator, surveying instrument, or autonomous vehicle requires position information, a GPS module can provide it. Prices for devices that provide this information range from less than a dollar for chips used in cell phones to hundreds of dollars for modules and boards that offer high accuracy. Cell-phone GPS receivers might get you “close enough,” but higher-end modules can offer centimeter accuracy. “At its simplest, a GPS receiver acquires satellite signals, decodes their information, and calculates a position, time, and velocity,” explained Joel Avey, director of marketing at Trimble for the company’s advanced devices.

Once in a while engineers unfamiliar with GPS technology misunderstand how it works. “They may think a GPS module communicates with satellites,” said Ken Hartman, chief technology officer at the Navsync Division of Connor Winfield. “A GPS module only receives the satellites’ information and the module cannot report its position to a remote location unless you build that capability into a product.” After engineers get past a few misconceptions, they understand how the GPS system works.
 
Because GPS-module vendors offer such a wide array of products, Avey tells designers and system integrators to first thoroughly understand their need for GPS information. “What do you want to accomplish and what kind of operating environment do you expect?” asked Avey. “Often people have unrealistic expectations for a GPS receiver and they don’t understand what a receiver can and cannot do. So they should ask vendors, ‘Is GPS feasible for my product? Can a GPS receiver operate under X, Y, or Z conditions? And what kind of accuracy can I expect in this application?’”

Many engineers assume that just because a GPS receiver indicates a location, that represents the correct physical position. A receiver works with the information it has, and sometimes that information includes errors. “Often engineers do not consider the sources of errors, so we must explain them,” said Jonathan Auld, development manager for survey and core products at Novatel. “First, satellite orbits aren’t precise, so a GPS receiver won’t know a satellite’s position with an accuracy of better than about one or two meters. Second, the clocks onboard the satellite introduce small errors. Third, as the weak GPS signals move through the ionosphere and troposphere those layers contribute errors. Fourth, nearer the receiver, signals can reflect from nearby objects and interfere with the main signal. And fifth, the GPS receiver and its surrounding circuits contribute some electrical noise.” Bundle those together — less system noise — and you come up with user equivalent range error. (see For further reading) According to Robert Snow, director of product marketing in the Professional Business Unit at Magellan, engineers most often misunderstand how sky conditions and a receiver’s “view” of the sky will affect accuracy. “You would get the best accuracy in a position surrounded by satellites including those “underneath” the Earth,” said Snow. “But satellite signals do not pass through the Earth, so the next best location is on the ocean where a receiver sees satellites across the sky and thus will produce a very accurate horizontal position. As buildings, trees, or a tunnel block the sky, conditions cause a receiver to ‘lose’ satellites, which decreases accuracy.” Snow noted that vertical accuracy is about 1½ times worse than horizontal accuracy because you don’t have any satellites “underneath” you.

Obstructions not only attenuate satellite signals, they can completely block them so receivers cannot detect signals from some of the satellites. When you drive through a city, for example, a GPS receiver can pick up signals from only a few satellites. And in some cases, even in an open area, a GPS receiver may not get useful signals from all visible satellites.

The degradation of accuracy measurements caused by the “geometry” or position of usable satellites falls under the heading of dilution of precision (DOP) or geometric dilution of precision. DOP characteristics apply individually to horizontal, vertical, 3-D, and time information. Think of DOP this way: Suppose you must triangulate the position of a distant water tower. You make angular measurements from two positions 10 feet apart at your known location. Then you choose two other known positions three miles apart and make another pair of angular measurements. Obviously as you increase the baseline-measurement distance, the accuracy of your triangulated distance measurement increases. Likewise, better accuracy results from a wider spread of satellites visible at a receiver’s location.“Most GPS receivers will calculate a DOP value — if you want it — so you can determine accuracy based upon the satellites in view,” noted Magellan’s Snow. “Geometry can severely degrade accuracy.” DOP values range from 1 (ideal) to 21-50 (poor).

A signal that arrives via multiple paths as it reflects off hard surfaces such as cars and buildings also can degrade accuracy. “Those signals arrive later than they should, so they seem to a GPS receiver as though they originated at a more-distant satellite. So, the receiver places your location a bit off.” said Snow. “We have special receivers that reduce multipath effects. Most vendors try to reduce them in one way or another. Mitigating the affects of multipath signals is very important in terms of maintaining accuracy.”

Time for Acquisition

It takes time for a GPS receiver to acquire a fix on its position, and developers often use time-to-first-fix specs to compare receiver performance. “System designers may not realize the receiver must go through an acquisition, or search, process that searches the GPS RF spectrum for signals and then process the received data,” explained Trimble’s Avey. “After the receiver acquires the satellite signals, it can interpret the data and go into a tracking mode. The acquisition phase requires a stronger signal, or higher receiver sensitivity, than the tracking phase. During acquisition, the receiver must pick signals out of background noise and verify they are primary signals and not a side-lobe signal or a false-lock signal. After verifying it has the correct signals, the receiver can track satellites as lower signal levels because it knows what to look for in the signals it receives.”

Avey explained that in some cases a receiver just cannot “find” enough satellite signals to get a good fix, due to low signal levels caused by dense foliage and tree canopies, tunnels, buildings, and so on. “So engineers might say, ‘You specified the receiver could operate at such-and-such a signal level, but it doesn’t.’ They don’t understand there is a difference between the signal levels needed for acquisition and tracking.”

Outdoors with clear view of the sky, acquisition can require from one to 10 seconds, depending on the receiver and the environment. According to Avey a worst-case startup in which the GPS receiver has no information about time, position, or satellites could take from 40 to 45 seconds. “In 99 percent of the cases, it should take under a minute. But engineers must understand that acquisitions depend on how much information a receiver has. When a receiver knows the time of day, its location to within several kilometers, and has a complete set of almanac and ephemeris information for the satellites, startup can proceed quickly,” noted Avey. Typically, receivers store that information in memory and they maintain a real-time clock, even in sleep or low-power modes.

Some applications can benefit from network assist information that provides location and other data. A GPS receiver will “see” at least four satellites 99.99 percent of the time. But, the receiver needs to know which of the satellites it can “see” at a given location or time. (Otherwise, it must “hunt” for unique satellite signatures, which can take time.) “Network-assist information provides satellite-constellation, time, location, and almanac data to a receiver,” noted Navsync’s Hartman. “Then a receiver can determine which satellites to look for. By narrowing the search criteria, the receiver can look for a lower signal level from specific satellites, which it could not do if it had no information about visible satellite positions. Keep in mind that the network-assist information comes from a remote source, and it provides data for that location. So if you plan to use network-assist information, choose a source within about 100 km of your receiver’s location.” Without network-assist information, Hartman reported seeing a GPS receiver take 45 minutes to obtain a position fix.

The network-assist information comes from cellular-service providers as well as from some GPS-receiver manufacturers. “Upon request we provide that data for our customers and we can explain how they can supply their own network-assist information to receivers,” said Hartman. “Engineers might think network-assist data will let a receiver lock onto satellites regardless of signal levels and local conditions. But the receiver is always up against its fundamental signal-to-noise limits, so under poor conditions, even with network-assist data, a receiver might not lock onto satellites.”

Antennas Make or Break Performance

“We make systems that measure with centimeter accuracy,” said Magellan’s Snow. “So we pay a lot of attention to antenna design and placement, ground planes, and low-noise amplifiers. They ensure our equipment will make excellent measurements.” So, engineers must ensure that a receiver gets good signals: They cannot simply run a long piece of cable from a receiver to an antenna and expect good results. In some applications, they may need a low-noise amplifier at the antenna and they may need assistance with antenna designs.

Engineers should keep passive antennas close to a GPS receiver. “In all cases, a GPS receiver provides the position of its antenna and not the receiver,” stressed Snow. “So if you have a GPS receiver on a ship, you need to know the relationship on the antenna to the ship’s keel so you can relate the antenna position to the ship’s actual position.”

Compare Equivalent Receiver Specs

Before you include a GPS receiver in a product, carefully examine its specifications and compare them with those of other receivers. Unfortunately, these comparisons get complicated. “Companies often use different units to specify accuracy,” said Jonathan Auld of Novatel. “So, engineers see specs such as ‘accurate to 50 cm CEP,’ ‘accurate to 50 cm RMS,’ or ‘accurate to 50 cm 2DRMS.’ You must know how to analyze and convert between those different accuracy measures, because 50 cm CEP refers to the radius of a circle in which 50 percent of the values occur, while 50 cm 2DRMS equals better than 50 cm accuracy 95 percent of the time.” CEP stands for circular error probable and 2DRMS equals two times the horizontal RMS error value. (See For further reading)


Vendors will lend engineers GPS receivers so they can run their own tests. To ensure valid test results, test the receivers in the same physical location. Auld recommended engineers connect all the test receivers to one antenna through a splitter. (Tests may need amplifiers or attenuators to ensure each unit receives the signal amplitude called for by its manufacturer.) “That arrangement eliminates any environmental differences. If you separate antennas by, say, 10 feet, one may ‘see’ multipath signals because you put it closer to a metal surface, such as an air vent. So, the different signal environments could skew test results. If possible, all test receivers should ‘see’ the same RF signals. When receivers come with built-in antennas, you can at least place the receivers near each other for testing. We recommend a spacing of more than a meter so antennas don’t interfere with each other.”This type of testing provides an added benefit: All receivers see the same constellation of satellites. If you test receiver A in the morning and receiver B in the afternoon, satellite positions will have changed, as may have ionospheric or tropospheric conditions.

“If you cannot test all receivers simultaneously, you can run a 24-hour test,” noted Sara Masterson, product manager for survey and core products at Novatel. “The satellite constellation pattern repeats every 23 hours and 56 minutes. But, testing over the same 24-hour period the next day doesn’t eliminate changes in the atmosphere due to a solar storm or other effect.”

In addition, the National Space-Based Positioning, Navigation, and Timing Executive Committee, which oversees the GPS satellites may shut down one satellite and activate a spare during routine operations. So, day-to-day test conditions can change more than you might think. The U.S. Coast Guard “GPS Notice Advisory to Navstar Users” documents (NANUs) disseminate information about the GPS constellation. www.navcen.uscg.gov.

For Further Reading

Indoor GPS,” AN01, Navsync GPS Technologies.

Network Assistance,” AN02, Navsync GPS Technologies.

“GPS Position Accuracy Measures,” APN-029 (Rev 1), Novatel, 2003.

Trimble’s planning software, a stand-alone software tool helps analyze visibility of GPS, GLONASS, IGSO and geostationary satellites. (Download.)

Van Diggelen, Frank, “GPS Accuracy: Lies, Damn Lies, and Statistics,” GPS World, 2007.

Wormley, Samuel J., “GPS Errors & Estimating Your Receiver’s Accuracy.”
 

Leave a Comment

QuickSilver CarLocator ~ ver 1.48

(The title screen artwork is by Art Fitzpatrick and can be purchased here.   I just felt that a link would be the right thing to do, in return for borrowing part of this great painting – ’69 Pontiac GTO at Hydra Island  ) )
carlocator11.jpg
 

Best Quicksilver skin yet!!

Many thanks to OP for his contributions (which I’ve enhanced some more 🙂 )

Clicking on the Save Car Location button saves 4 clicks…

and takes you right to this screen…

carlocator16.jpg

Click on Coordinates, then Done, and your Car’s present parked location is in memory.

carlocator5a.jpg

To locate your parked car…

carlocator13.jpg
.
carlocator14.jpg

No stylus required with this skin!! 


QuickSilver CarLocator  ~ Version 1.48

  1. Tweaked the Flyover button to comply with the Phase 3 (inactive) behavior of the others  – ameridan

  2. Fixed and repositioned the Stop Recording Track Log button on the map screen that resulted in an error  – ameridan
  3. Revised tepsi.bmp file so that Navigation bar buttons work properly  – ameridan
  4. Right third of Navigation bar changed from Speak Last Command to Large Target Street font – OP
  5. Middle third of Navigation bar remains as Speak Last Command  – ameridan
  6. Left third of Navigation bar no longer serves as shortcut to Route screen  – ameridan
  7. Digital font used for Clock, Speed, and Altimeter – OP and ameridan
  8. Set FavPOI script written to choose MyPOI group as favorite – OP
    favcat21.jpg
  9. Cursor button text changes from “Cursor” to “Close” when menu bar is opened – ameridan
  10. Back button changed from small pale green arrow to larger yellow arrow  – ameridan
  11. Added “Clear Pins” button to History screen, and changed Clear button text to “Clear All”  – ameridan
  12. Cockpit screen & Map screen menu bars – back button changed from down arrow to left arrow  – ameridan
  13. Settings button added for quick access to Cockpit Settings – ameridan
  14. Display/hide toggle button in Cockpit settings menu (in place of zoombar display/hide) for both FavPOI and Cockpit Settings buttons – ameridan
  15. Added toggle option in Cockpit settings for auto day/nite in double-button with manual toggle – ameridan
  16. Added toggle option for Cursor menu popup in double-button with Info show/hide toggle – OP and ameridan
  17. Added track recording start/stop button  in double-button with Manage track logs button – also serves as large indicator that track logs are RECORDING. – ameridan


This skin by default names the two favorites Home and Car, and the main screen has a new button to program your current location and assigns it to Car, the intent being that it will facilitate finding your Car later.

This is a skin alternative, not an Unlock package, and can be used as a new skin without unlocking – just don’t use the Exit button.

To avoid a lot of confusion when doing Route preplanning, stay in the Browse Map mode (with Auto-Recalculation turned off), since Cockpit mode is always focused on your current location and will appear to be ignoring your route.


   Version Log…

QuickSilver Reborn – A MioMap 3.3 Skin
Created By Ashwin Wavde
Inspired by Quicksilver for MioMap 3.2 by Matt Mullins (roscoe)

QuickSilver Reborn 1.0
* QuickSilver 1.0 for MioMap 3.2 modded for MioMap 3.3
* Added Cockpit Bar transparency
* Fixed turn distance guide visibility
* Various other improvements

QuickSilver Reborn 1.1
Compiled 2:56 PM 4/08/2007
*Adding compatability for split-screen data.zip

QuickSilver Reborn 1.3

*Added simple static car over arrow

Quicksilver ’66 for C230
*Icons redone by CD
*GTO car over cockpit arrow –  CD
*added toggle buttons cockpit view <-> browse map view – CD
*config folder fixed for C230 (roundabouts weren’t being announced) – ameridan

Quicksilver CarLocator for C230 1.45
Compiled 6:00 PM 2/15/2008
*2nd favorite tailored to Car location, rather than Work – ameridan
*All Favorite icons redone – ameridan
*New shortcut button on Main Screen to input location coordinates of parked car – ameridan

Quicksilver CarLocator for C230 1.46
Compiled 7:30 PM 2/27/2008
*added the the Binocular (Fit Route view on screen) and Route calculator (Recalculate toggling method each time) from the Olivercp Skin to the Browse Map screen – OP
*added POI button to cockpit screen – OP
*redid POI button to match others – ameridan

Quicksilver CarLocator 1.47
Compiled 12:00 PM 3/6/2008 – ameridan
*toggle for displaying POI button added to Map Settings – OP
*redid flyover button – ameridan
*added pin/unpin button to browse_map cursor popup – ameridan


  Version 1.48 download is available HERE.   

Installation Instructions:

The file DATA.ZIP   should simply replace (after backing up your original) AS-IS (don’t unzip):
 
  •    \My Flash Disk\MioMap\MioMap2\DATA.ZIP, if C230 is unlocked
  •    \My Flash Disk\MioMap\MioMap\DATA.ZIP, if C230 is locked 

After installing DATA.ZIP, you should set a Favorite POI group before clicking on the FavPOI button on the Cockpit screen or you may get a fatal error that ends the program and requires you to start it up again. 


As an option to try out Dominique’s Skins trick in an unlocked C230, copy the “SKIN” folder from the  Version 1.46  download into \My Flash Disk\MioMap\MioMap2  (or the contents of DATA.ZIP within should be added into  \My Flash Disk\MioMap\MioMap2\SKIN\DATA.ZIP).    See the Blog on Version 1.46 for more on this.


Comments (22)

Older Posts »